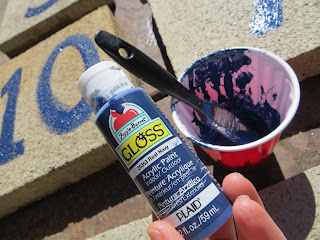
I spotted this idea on Pinterest a few months ago and pinned it right away because I thought my kids would love it. I could not find a tutorial on how exactly to make your own Hopscotch, but I gave it a go anyways!
Supplies:
10 Square Pavers (Mine were laying around in my yard.)
Acrylic Indoor/Outdoor Paint
1" Paint Brush
Disposable cup or bowl
Scrub brush
Step 1: Have your kids Clean the pavers with water and a scrub brush. Let dry.
Step 2: While pavers are drying, if necessary, clear the area you will be using for hopscotch and make the ground level.
On a side note, earth worms are very valuable to anyone who has a yard or garden, as they make the soil nice and rich. We discovered plenty of them and the kids wanted to be sure we didn't hurt them.
So we performed Operation Save the Worms and put the worms in buckets of dirt and transplanted them to a nice area in our garden.
Step 3: Hit the dirt with a flat shovel or stomp on it to make it nice and firm. I just did squat jumps on mine. That did the trick! :)
Step 4: On dry pavers, paint numbers 1-10 with 1" brush. Let Dry.
Step 5: Move pavers to the spot you want them. Make sure they don't move once you put them down (they should be level).
Step 6: Shovel dirt back into all the area around and in-between the pavers. Pack this dirt down very, very tight. Keep stomping down the dirt until it is level with the pavers and can't been stomped down any more. Brush of dirt with broom or scrub brush.
Step 7: Step back and admire it. Then let your kids enjoy it!
(Mine did!!!)
I still have quite a bit of dirt in the surrounding area to move and level, but overall, I like how this project turned out. I'd like to plant some nice green ground cover between the pavers. I think this will be a great addition to our backyard!
In case you were wondering, here is a link to how to play hopscotch!


No comments:
Post a Comment